While attending the Eyeo Festival over the summer, I saw a talk by Micah Scott in which she showed various projects including a desktop light sculpture she built using acrylic and LEDs.
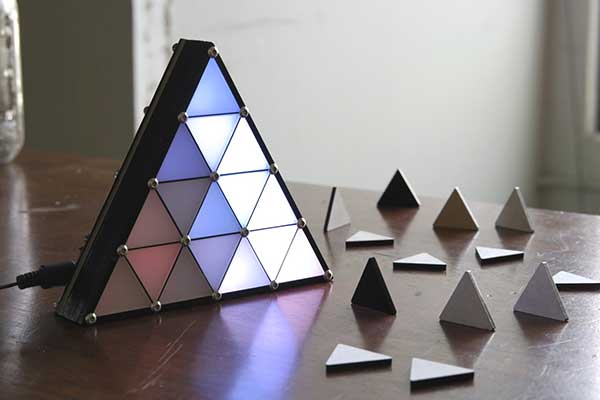
Triangle Attractor by Micah Scott
Inspired by Micah’s project, I decided to build a light sculpture for our first assignment in Digital Fabrication. However, I wasn’t crazy about the geometric rigidity of Micah’s sculpture, and felt a more organic form (cellular in nature) using a mixture of materials (both wood and plexi) could be an interesting derivative.

Something closer in feel to this!
While researching natural patterns and forms, I became fascinated by the many modular and repetitive patterns found in coral.
 The grid like form of the Star Coral reminded me of the grid step sequencers we had been discussing in Code of Music and I realized I could potentially turn my light sculpture into a melody step sequencer. This seemed like an interesting design problem. I liked the idea of dreaming up what a coral “sounds” like and the fun idea of “playing” a coral sculpture.
For first steps, I bought plexi from Canal Plastics, a fluorescent orange pink and transparent dark blue which reminded me of the bright and colorful patterns of coral, a see -thru mirror plastic and an opalescent clear acrylic which reminded me of the rainbow sheen on soap bubbles.
I drew up a few different forms in Illustrator rounding a hexagon polygon shape and slightly deforming the sides to give the appearance of irregularity. I decided to give myself free rein to cut many options out, and mix and match material combinations (plywood, basswood and plexi) until I found the right combination. This turned out to be an expensive route, and next time I will purchase smaller quantities of material for prototyping.

I vastly underestimated how long it would take to cut using the laser cutter. Thankfully, Kate was around while I was cutting and gave me some pro tips as far as doing a few passes and making sure I could visibly see the plastic or wood was cut through before removing from the laser bed.

After disassembling the many parts I had cut, and attempting to glue my coral plexi to the various frames I cut out, I quickly realized a few things:
- I do not have the patience for gluing small parts together
- Super glue is a really bad glue option if the glue will be seen. Also, will fog up opalescent/mirror plexi.
- Bright Orange/Blue combo is ugly and distracting.
- Wood + plexi means danger of project looking too DIY/crafty aesthetically
After cutting my designs, I felt a little lost for next steps and not sold on the aesthetics. I also wasn’t sure if I was building a light sculpture, or a sequencer. Luckily, I found a few circular step sequencer designs that seemed like they could work with my project, including this software interface for generating melodies.
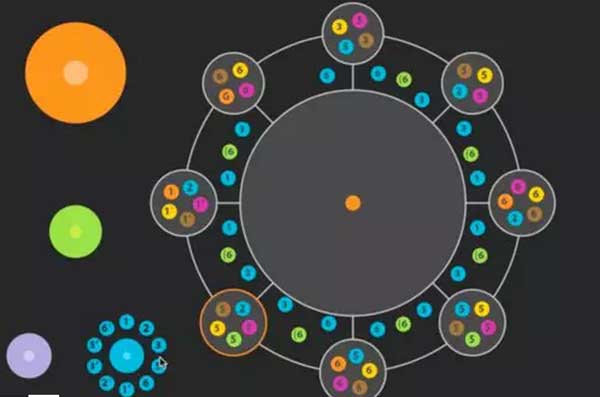 I still wasn’t entirely clear on the aesthetics but thankfully Sherri helped me mix and match the materials I had cut out until we reached a good design solution. Rather than cutting out the plexi forms to glue into the wood frame, we decided it would be easier, and more aesthetically pleasing to glue the wood frame on top of a piece of etched plexi. After building the layers together into one of the modular forms, the final aesthetic is much more polished and pretty. I could easily see this being the smaller circle of notes in the above sequencer design.
For next steps, I will need to get this project working with a Processing sketch that generates tones so I can user test the interface and potential interaction before building the larger sequencer. I am also going to attempt to get some LEDs rigged up to see how things look backlit on Monday. Lastly, I will need to figure out the hardware design/physical computing end of things. At this point, I think constructing a button to turn on notes will be the easiest option.
